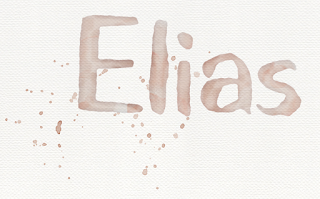
Watercolor Effect in Photoshop
This effect is a quick way to create a Watercolor feel to text, logo, ect. I'm working with Text, my Name. The Font I choose is one that represents the feel of a Brush.
Step 1: Basic Effect.
- Inner Shadow: the Color is a very dark gray (#080808)
- Blend Mode: Soft Light
- Opacity: 75%
- Other settings: 119°, 4px, 32px.
- Satin: the Color is White
- Blend Mode: Overlay
- Opacity: 28%
- Other settings: 14°, 82px, 32px,
- Contour: Gaussian in reverse.
Step 2: Smart Filters.
- Gaussian Blur: about 0,5 to 1 px
- Ripple: 25 %
- Median: 4 px
Set the Blend Mode of the object to Multiply.
Step 3: Clipping Mask Texture.
Now add a Paint Texture as a Clipping Mask. The Texture should be in Black and White. Set the Blend Mode to Lighten.
Step 4: Vector Mask Texture.
Now create a Group containing the Object and Clipping Mask. Give the Group a Mask and start painting with a Watercolor Brush on the Mask. Set the Opacity of the Mask around 65 - 70%.
Step 5: Adjustment Layers.
These settings will depend on your object and taste.
- Brightness/contrast: brightness: 17
- Hue/saturation: saturation: 32 and Lightness: -12
Step 6: Finishing Touch.
The finishing touch is a Paper Texture as Background and some Paint Splashes.
Font: Avera Sans TC Brush.


Reacties
Een reactie posten